From install to a screened file
The plugin applies a screen directly to your active document as a single undo step. Here's the whole workflow.
Work on a copy. Screening replaces the document's channels with the 1-bit result and flattens it (CMYK). Duplicate your file first if you want to keep the continuous-tone original — Image ▸ Duplicate….
Load the plugin into Photoshop
The plugin is a UXP panel. Most users install the packaged .ccx; developers can sideload the build with the UXP Developer Tool.
From a .ccx package
Double-click the .ccx file and Photoshop's plugin installer (Creative Cloud) adds it. Restart Photoshop if it's running.
Sideload for development
In the UXP Developer Tool, choose Add Plugin and select dist/manifest.json, then Load. Use Watch to auto-reload on rebuilds.
Screen a document
Plugins ▸ Dr. Lau's FM Halftone Screening to open the panel over your active document.-
Open the panel
Run
Plugins ▸ Dr. Lau's FM Halftone Screeningto open the panel. -
Open and select your artwork
Make the document you want to screen the active document. CMYK gives you full four-ink screening; RGB and Grayscale are supported too.
-
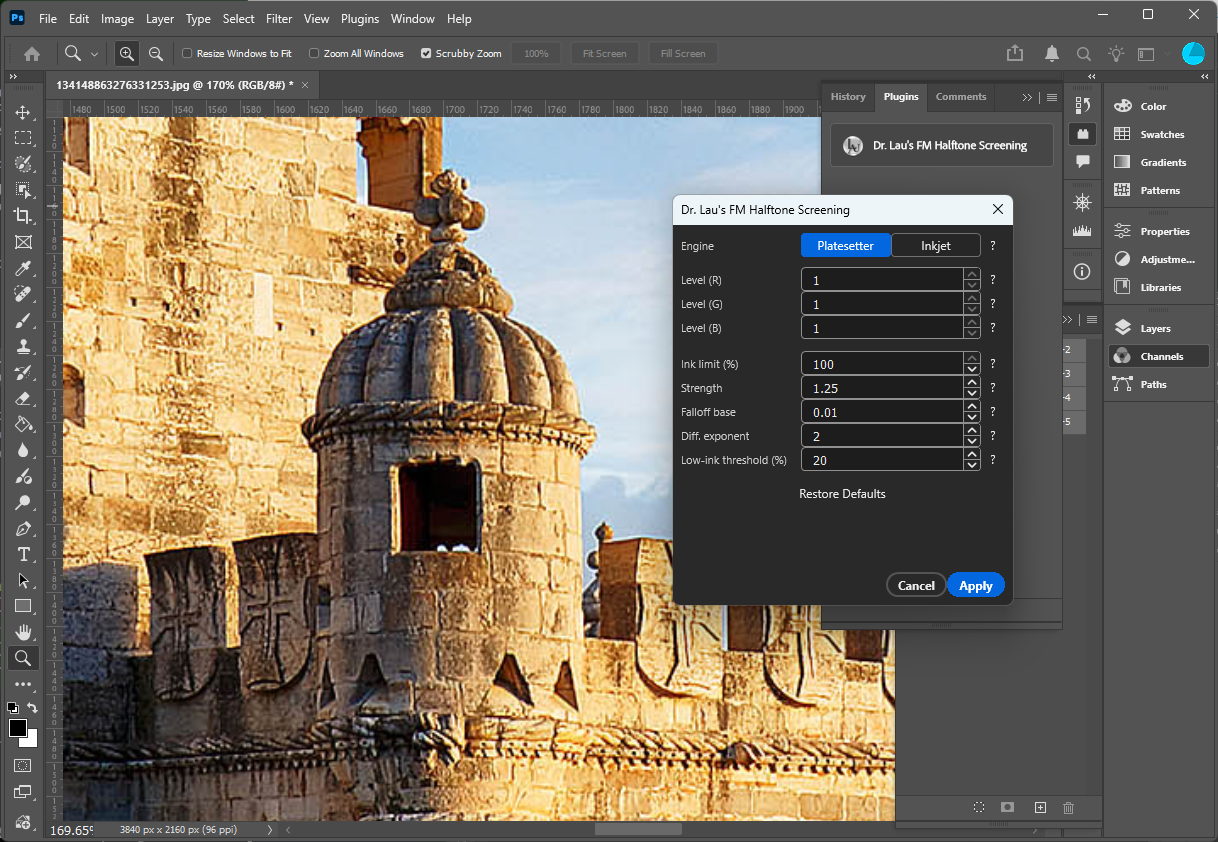
Choose an engine
Pick Platesetter for imagesetter / CTP output, or Inkjet for flatbed and wide-format devices. Irrelevant controls hide themselves.
-
Set the ink limit
Leave it at 100% for the full tonal range, or lower it to cap total coverage for your press conditions.
-
Tune the engine controls (optional)
Adjust the Platesetter hysteresis or the Inkjet overlap option — or just use the defaults. Each control has a ? for an in-panel explanation.
-
Apply
Run the screen. The plugin halftones every channel and writes the binary result back into the active document — one undo step.
How each document type is handled
| Mode | Behavior |
|---|---|
| CMYK | The document is split into four temporary grayscale channels, halftoned together with the chosen engine, and the binary planes are written back into the original's C/M/Y/K channels. The temp docs are then closed and the document is flattened. A brief flash of temporary documents during the run is normal. |
| RGB | Read directly; R/G/B are treated as the C/M/K roles (yellow ignored) for either engine, halftoned, and written back in place. |
| Grayscale | Read directly; the single channel is treated as CMYK's K and run through the Platesetter screen (plain error diffusion — no hysteresis). The Engine selector doesn't apply. |
Split into dark, light & light-light inks
Separate a CMYK image into the lighter inks modern Epson photo printers carry — a contone, proof-ready ink split.
-
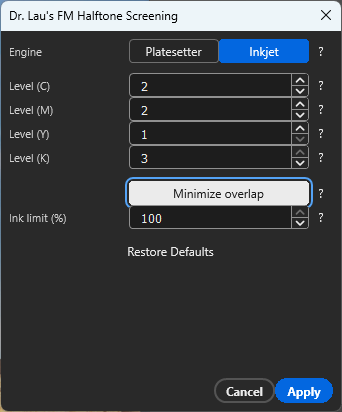
Choose the Inkjet engine
The per-channel level controls are an Inkjet-engine feature; the Platesetter engine locks every level to 1.
-
Set the levels per channel
For each process color, pick 1–3 levels.
2gives Color + Light;3gives Color + Light + Light Light. Match the counts to the inks your printer loads (e.g. an Epson P600: C 2, M 2, Y 1, K 3). -
Apply
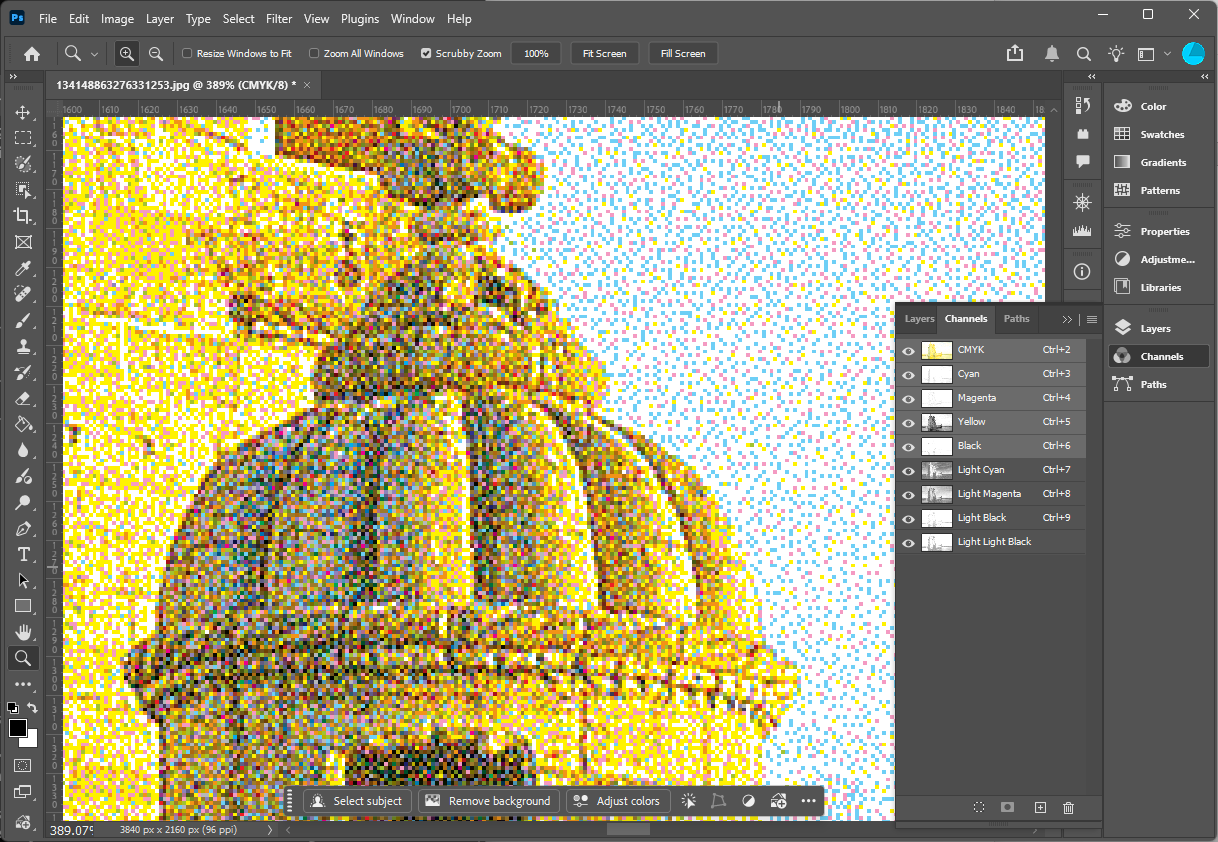
Run the plugin. It splits each color with the LAUSuperRIP multilevel curve, reduces the process channel to the darkest level, and adds pure
Light …/Light Light …spot channels — all as one undo step ("Create Spot Levels"). -
Review the channels
Open the Channels panel to see the new light-ink spot channels and proof exactly which inks will be used and at what coverage.
Single-use, destructive. Creating spot levels flattens the document and reduces its process channels in place — run it once on a fresh document. To try different level counts, revert (or work on a duplicate) first.
Getting the look you want
Texture: dispersed vs. clustered (Platesetter)
- For the cleanest, most dispersed dots, raise Strength and keep the falloff gentle.
- For a softer, lightly clustered look, lower Strength toward 0 — at 0 you get plain green-noise error diffusion with no inter-channel suppression.
- If highlights look over-structured, raise the Low-ink threshold so hysteresis rolls off sooner in the lightest tones.
Density vs. dot-off-dot (Inkjet)
- Turn Minimize overlap on for side-by-side inks — better for substrates where stacked ink would pool or gloss unevenly.
- Turn it off for denser, glossier coverage where overprinting is desirable.
Staying under a total-ink limit
- Lower the Ink limit (%) to scale all channels down before screening, keeping total coverage within your press's tolerance.
Verify before you commit. Screen a copy, view it at 100% (and on your proofing device) before replacing your production file. The result is 1-bit per channel — what you see is exactly what goes to the device.
Questions about requirements or behavior?
The FAQ covers Photoshop versions, undo, CMYK handling and more.
Read the FAQ →